一、彻底删除 MySQL
卸载
# yum -y remove mysql*查找残余的组件
# rpm -qa | grep -i mysql如果有残余组件就删掉
# yum remove mysql-community*查找残余目录 / 及删除
# whereis mysql
# rm -rf xx
# find / -name mysql
# rm -rf xxrm -rf /etc/my.cnf 二、安装 MySQL
查询是否安装了 mariadb
# rpm -qa | grep mariadb卸载mariadb(与MySQL有冲突)
# yum -y remove mariadb*切换到 / 目录,创建 mysql 文件夹
# cd /
# mkdir mysql
# cd /mysql
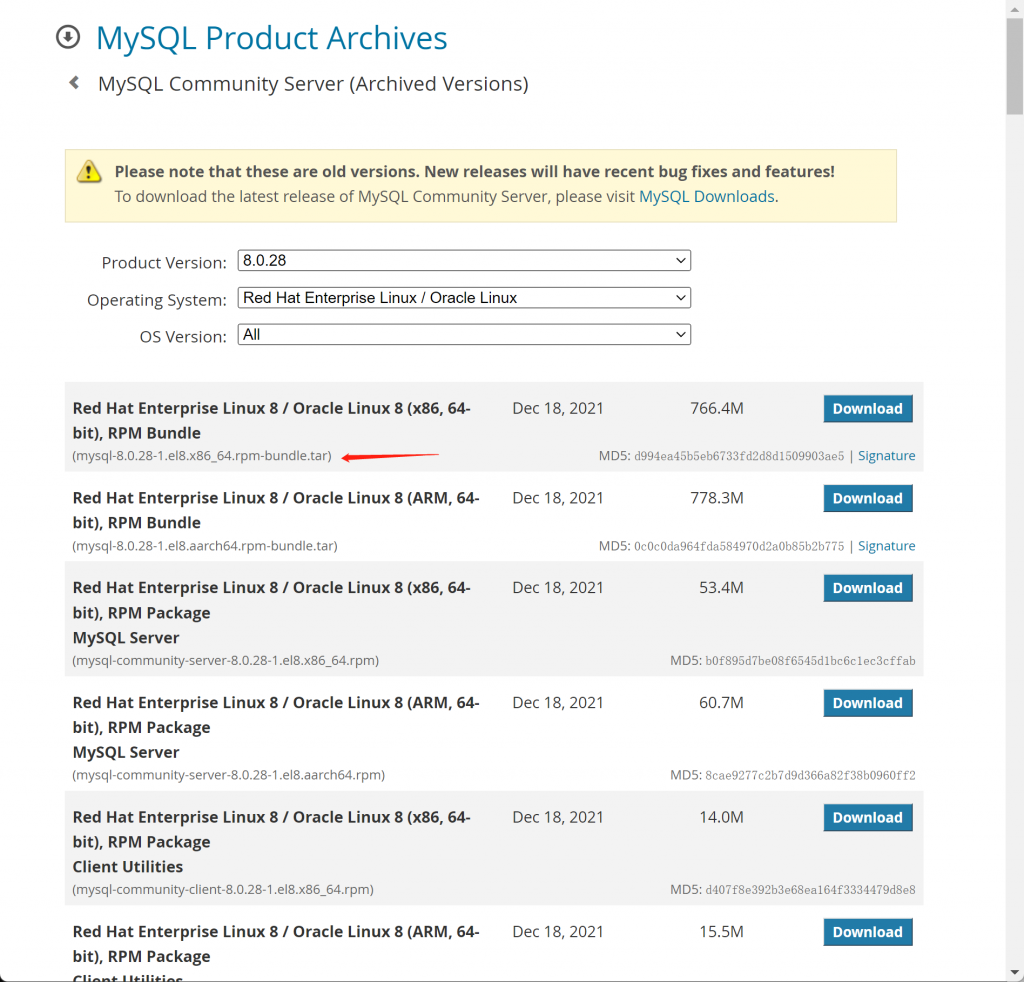
到 MySQL 官网查找所需的版本 MySQL Community Server (Archived Versions)
注意:下载 tar

通过 Download 链接,下载安装包到 mysql 文件夹
# wget https://downloads.mysql.com/archives/get/p/23/file/mysql-8.0.11-1.el7.x86_64.rpm-bundle.tar
解压
# tar -xvf mysql-8.0.11-1.el7.x86_64.rpm-bundle.tar安装
# rpm -ivh mysql-community-common-8.0.11-1.el7.x86_64.rpm
# rpm -ivh mysql-community-libs-8.0.11-1.el7.x86_64.rpm
# rpm -ivh mysql-community-client-8.0.11-1.el7.x86_64.rpm
# rpm -ivh mysql-community-server-8.0.11-1.el7.x86_64.rpm
安装出现
libcrypto.so.10()(64bit) is needed by mysql-community-libs-8.0.11-1.el7.x86_64
libcrypto.so.10(libcrypto.so.10)(64bit) is needed by mysql-community-libs-8.0.11-1.el7.x86_64
libssl.so.10()(64bit) is needed by mysql-community-libs-8.0.11-1.el7.x86_64
libssl.so.10(libssl.so.10)(64bit) is needed by mysql-community-libs-8.0.11-1.el7.x86_64
# yum install -y compat-openssl10
# yum install -y openssl-devel
安装出现
libncurses.so.5()(64bit) is needed by mysql-community-client-8.0.11-1.el7.x86_64
libtinfo.so.5()(64bit) is needed by mysql-community-client-8.0.11-1.el7.x86_64
# yum install -y libncurses*安装出现
libaio.so.1()(64bit) is needed by mysql-community-server-8.0.11-1.el7.x86_64
libaio.so.1(LIBAIO_0.1)(64bit) is needed by mysql-community-server-8.0.11-1.el7.x86_64
libaio.so.1(LIBAIO_0.4)(64bit) is needed by mysql-community-server-8.0.11-1.el7.x86_64
libnuma.so.1()(64bit) is needed by mysql-community-server-8.0.11-1.el7.x86_64
libnuma.so.1(libnuma_1.1)(64bit) is needed by mysql-community-server-8.0.11-1.el7.x86_64
libnuma.so.1(libnuma_1.2)(64bit) is needed by mysql-community-server-8.0.11-1.el7.x86_64
# yum install -y libaio numactl查看已经安装的 MySQL 列表
# rpm -qa | grep mysql
进行初始化操作
# 初始化
# mysqld --initialize

# 分配权限
# chown mysql:mysql /var/lib/mysql -R

# 启动 MySQL
# systemctl start mysqld.service

# 设置自启动
# systemctl enable mysqld
获取初始化生成的密码
# cat /var/log/mysqld.log | grep password
2022-05-11T02:57:28.681043Z 5 [Note] [MY-010454] [Server] A temporary password is generated for root@localhost: +o&&l9JAd1qf
以 root 用户身份使用初始化生成的密码 [+o&&l9JAd1qf] 登录,同时修改密码
# mysql -uroot -p

> ALTER USER root@localhost IDENTIFIED  BY '123456';
> FLUSH PRIVILEGES;
如果出现 MySQL 8.0 设置简单密码报错ERROR 1819 (HY000): Your password does not satisfy the current policy requirements
试试执行
> set global validate_password.policy=0;
> set global validate_password.length=1;
> ALTER USER root@localhost IDENTIFIED  BY '123456';
> FLUSH PRIVILEGES;
就此安装完成了
三、分配远程账号(指定所有权限)
> CREATE USER 'username'@'%' IDENTIFIED BY 'password';
> grant ALL on *.* to username;
> flush privileges;
四、防火墙问题
先测试是否可以链接,如果可以忽略此步骤
公网服务器,需要排查下后台的策略规则
#查看服务器是否打开3306端口
firewall-cmd --zone=public --list-ports
#开启防火墙
systemctl start firewalld
#如果没有的话就添加3306端口
firewall-cmd --zone=public --add-port=3306/tcp --permanent
#重启防火墙
firewall-cmd --reload- 打赏


- 微信
- 支付宝
