本教程使用的是 Windows Wsl 的 OracleLinux 7.9 系统!
一、添加 GitLab 源
# curl https://packages.gitlab.com/install/repositories/gitlab/gitlab-ce/script.rpm.sh | sudo bash
二、安装 GitLab
# yum install -y gitlab-ce
三、配置 GitLab
启动 GitLab 默认会使用到以下端口:

由于 80、8080 是开发常用端口,也极有可能出现冲突,所以本文就只修改 ngnix、puma 端口。
# vim /etc/gitlab/gitlab.rb

找到 external_url 配置主机IP或域名
external_url 'http://172.20.231.207'

找到 nginx 配置自定义的端口
nginx['enable'] = true
nginx['listen_port'] = 8095

找到 puma 配置自定义的端口
puma['enable'] = true
puma['port'] = 8081
如果你的时间很充裕,请 点击此处!看看是否有必要在 GitLab 重载配置前,一并处理了。
以下是 /etc/gitlab/gitlab.rb 配置内容:


四、启动 GitLab
1、重载 GitLab 配置
# gitlab-ctl reconfigure这个过程需要一段时间,等待 3-10 分钟!
如果 10 分钟后,依旧卡在该界面,可以尝试这个方法。点击此处
你也可以直接执行异常所需要的指令,这不影响你的安装,也避免浪费时间。

出现以下界面,表示配置重载成功。

查看初始密码,在上面图片标注的文件中。
# cat /etc/gitlab/initial_root_password
2、GitLab 执行指令
# gitlab-ctl start [启动服务]
# gitlab-ctl status [查看状态]
# gitlab-ctl stop [停掉服务]
# gitlab-ctl restart [重启服务]
# gitlab-ctl reconfigure [重载配置,使其生效]
一般情况,执行指令 # gitlab-ctl reconfigure 后,服务会自动重启且生效。
如果你发现你的配置并未生效,可以在指令 # gitlab-ctl reconfigure 结束后,使用 # gitlab-ctl restart 重启服务。
※ 异常处理
关于 # gitlab-ctl reconfigure 指令,长时间停在 ruby_block[wait for redis service socket] action run 不执行的问题处理。
重新打开一个终端窗口,执行如下指令:
# /opt/gitlab/embedded/bin/runsvdir-start
安装结束后,使用 Ctrl + C 结束该任务!
五、登录 GitLab


登录进去后,需要马上更改 Root 的密码。初始化生成的密码,仅 24 小时内有效!!!

设置后,划到底部,点击 Save Changes 保存设置。
六、使用 GitLab
1、禁止注册
默认情况下,GitLab 是支持注册的,但是注册后是需要管理员审核,但是为了避免被频繁注册,有必要设置禁止主动注册的。

设置后,划到该折叠选项的最底部,点击 Save Changes 保存配置。
2、项目管理
2.1、新建组


2.2、新建项目


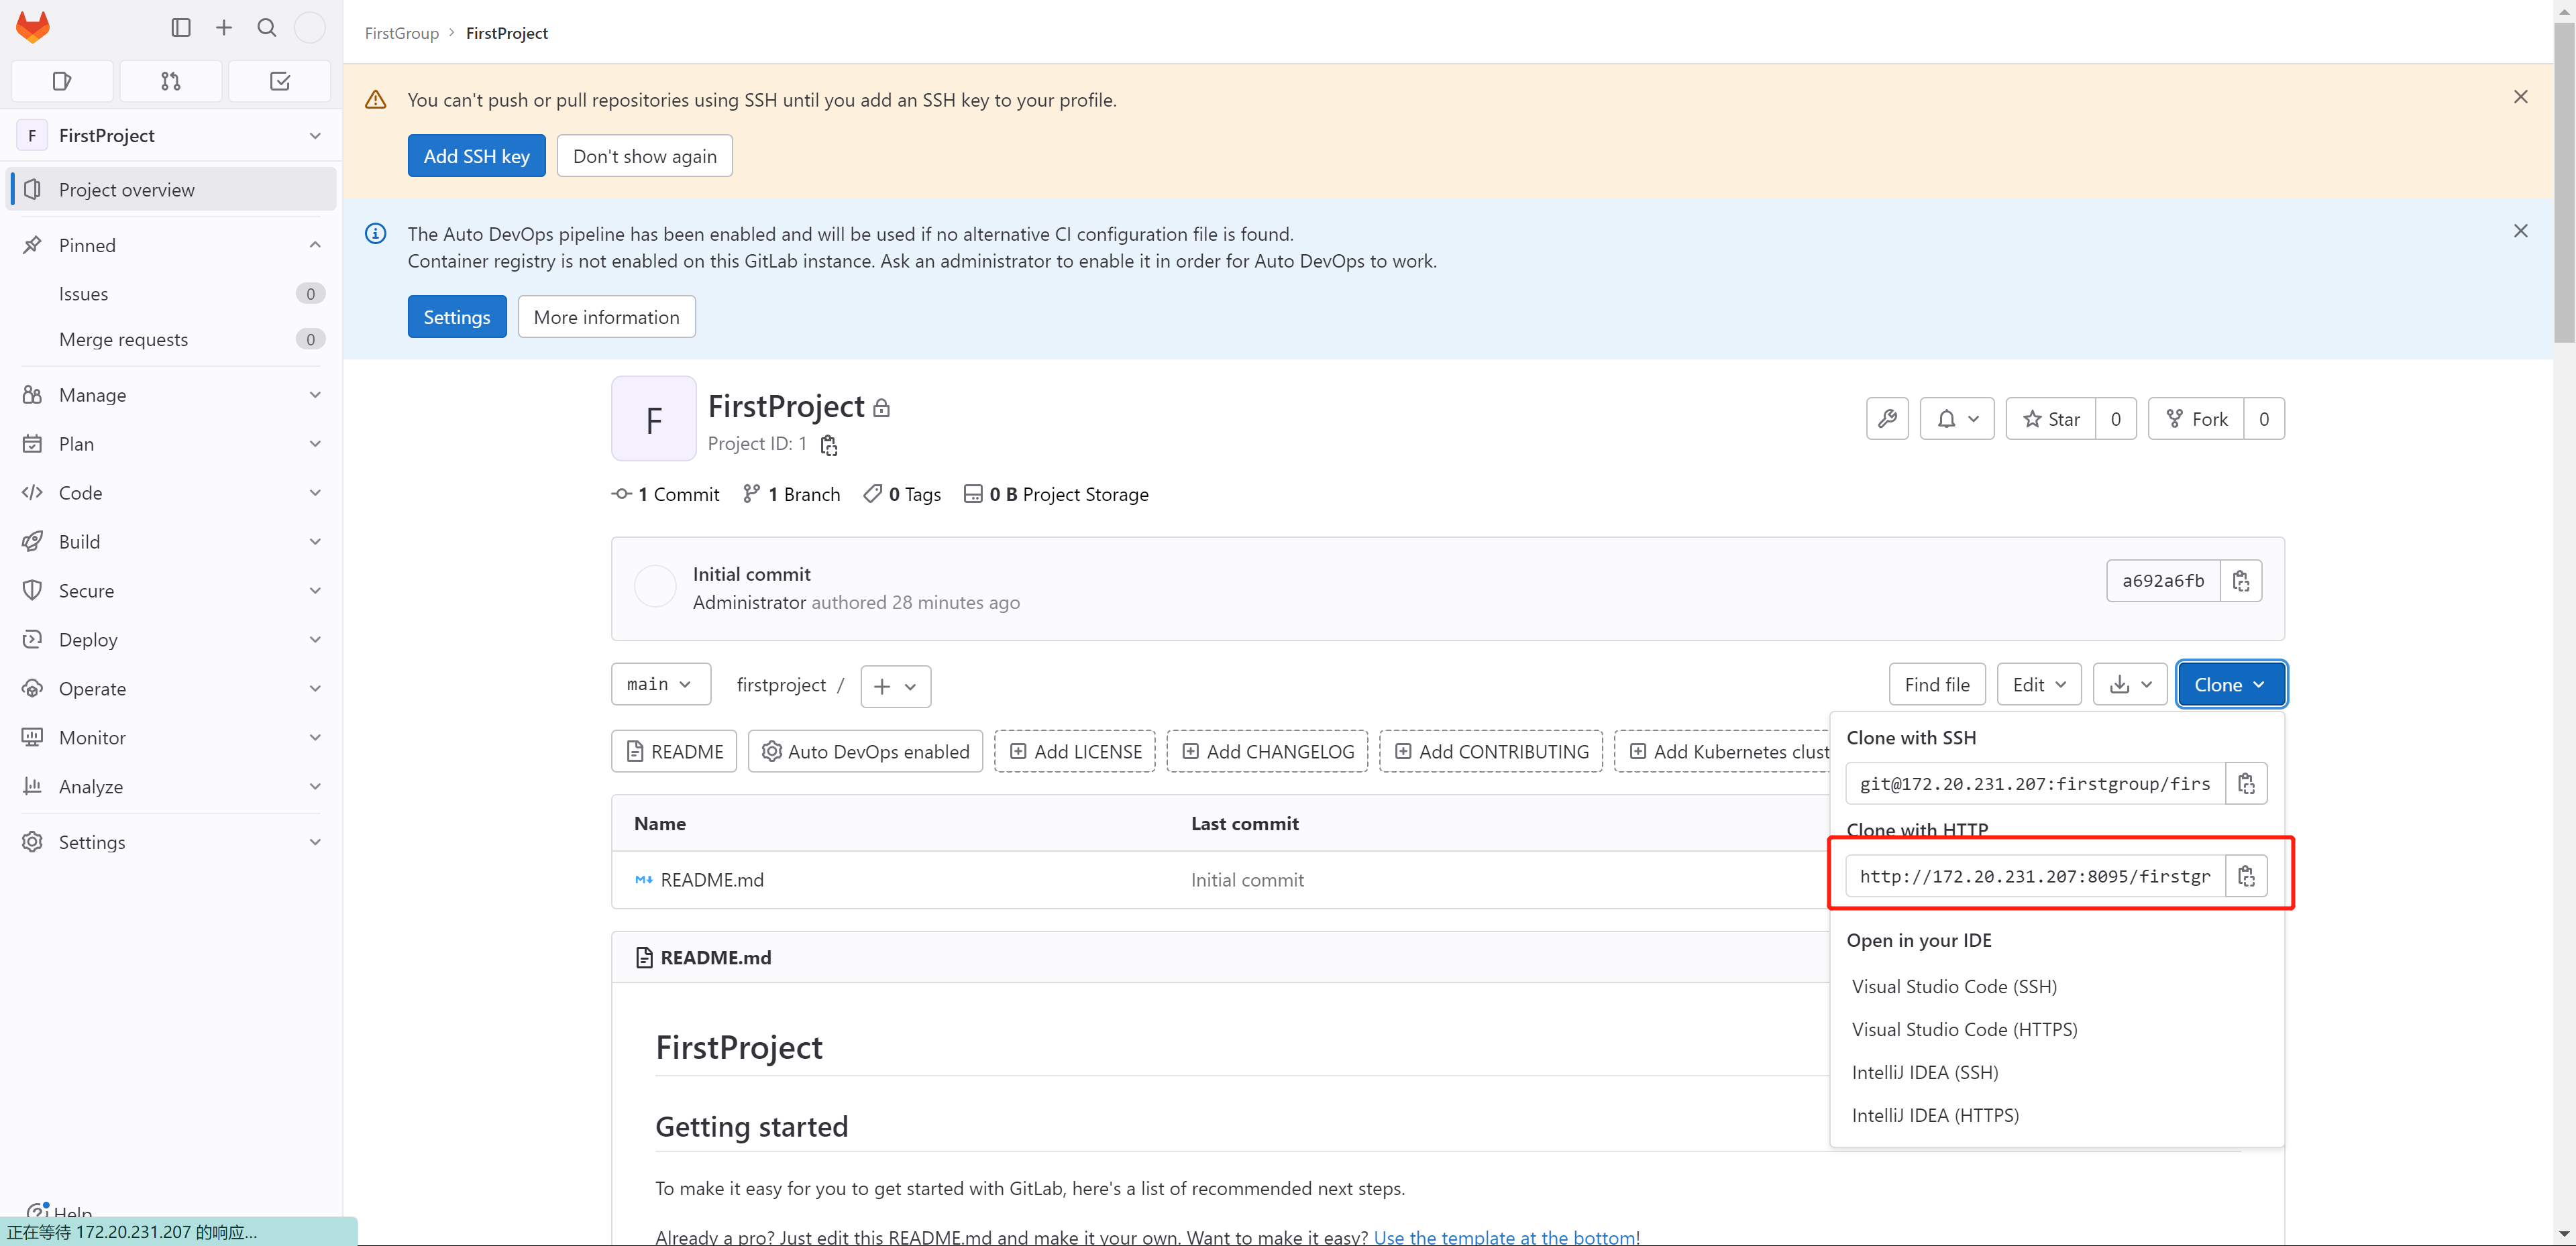
你会在项目的 Clone HTTP 中发现,我们配置的 8095 端口没有被添加上,此时,我们可以回到 # vim /etc/gitlab/gitlab.rb 配置 external_url 'http://172.20.231.207:8095',然后执行 # gitlab-ctl reconfigure 。
配置后效果如下:

2.3、拉取项目
此处不做详细的 Git 操作,仅演示成功的效果!!!


2.4、SSH 配置
未完善部分,后续更新
七、卸载 GitLab
1、停止 GitLab
# gitlab-ctl stop
2、卸载 GitLab
# yum remove -y gitlab-ce
3、查看 GitLab 进程
# ps aux | grep gitlab
4、结束进程
一般情况 kill 第一个进程后,会自动结束其他进程。
若其他进程没有被自动 kill,就手动执行吧~
# kill -9 377最终效果,如图:

5、删除残余文件
由于我使用的是 Windows Wsl,为了避免 Windows 文件被意外清除,所以使用以下指令,排除特殊的目录文件
# find / -path /mnt -prune -o -name *gitlab* -print | xargs rm -rf
# find / -path /mnt -prune -o -name gitlab -print | xargs rm -rf
如果你是正常的 Linux 系统,可以直接使用下列指令
# find / -name *gitlab* | xargs rm -rf
# find / -name gitlab | xargs rm -rf- 打赏


- 微信
- 支付宝
